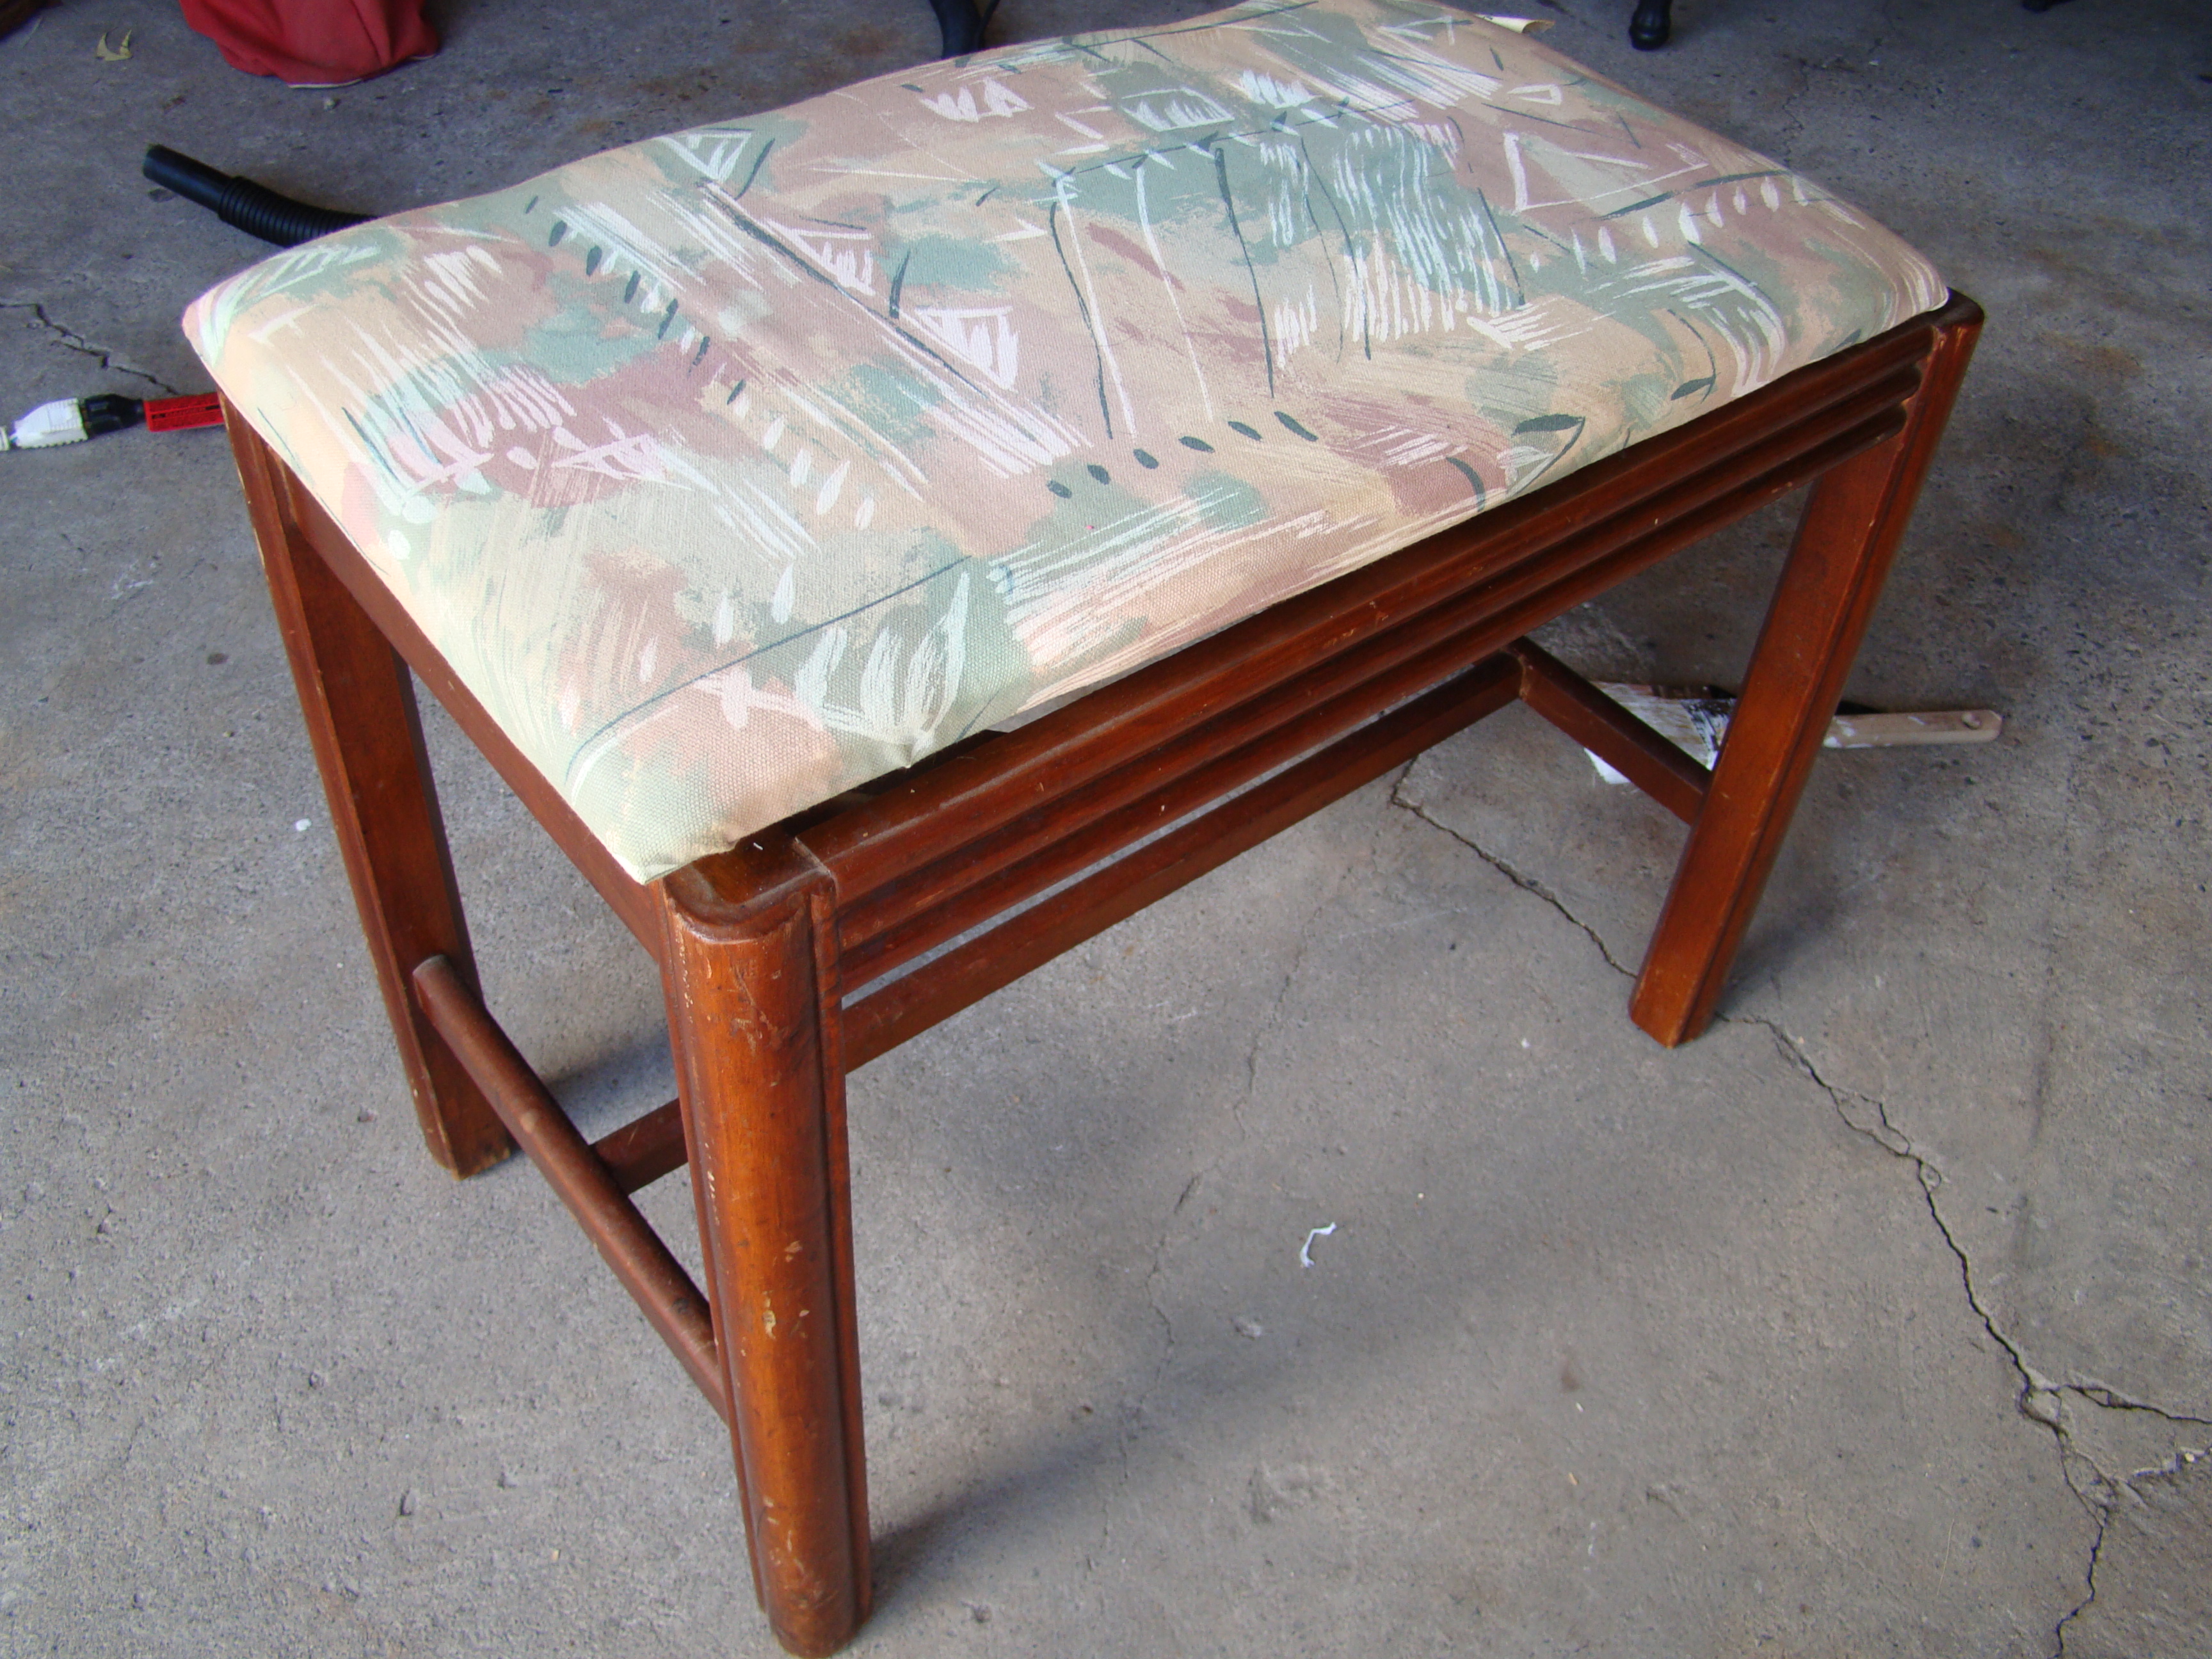
An old piano bench is updated and ready for use in any room of your home in today’s before and after photos…
This little gem was just a few dollars, but in desperate need of a makeover.
I had an old burlap coffee sack on hand, and I thought it would make a great fabric in which to reupholster the bench seat; so, I got to work.
First, I removed the seat and took the fabric off of it. I kept the same foam, but added more batting around the seat to add softness. Next, I upholstered the seat in some old drapery lining fabric I had on hand- solid white. Since the burlap is a loose-weave fabric, I though it best to contain the batting in another fabric before covering the seat in the burlap. This process was easy – I simply pulled the fabric to the back of the bench seat and stapled it in place. Then, I did the same thing with the burlap, cutting away the excess fabric and batting for a neat appearance underneath.
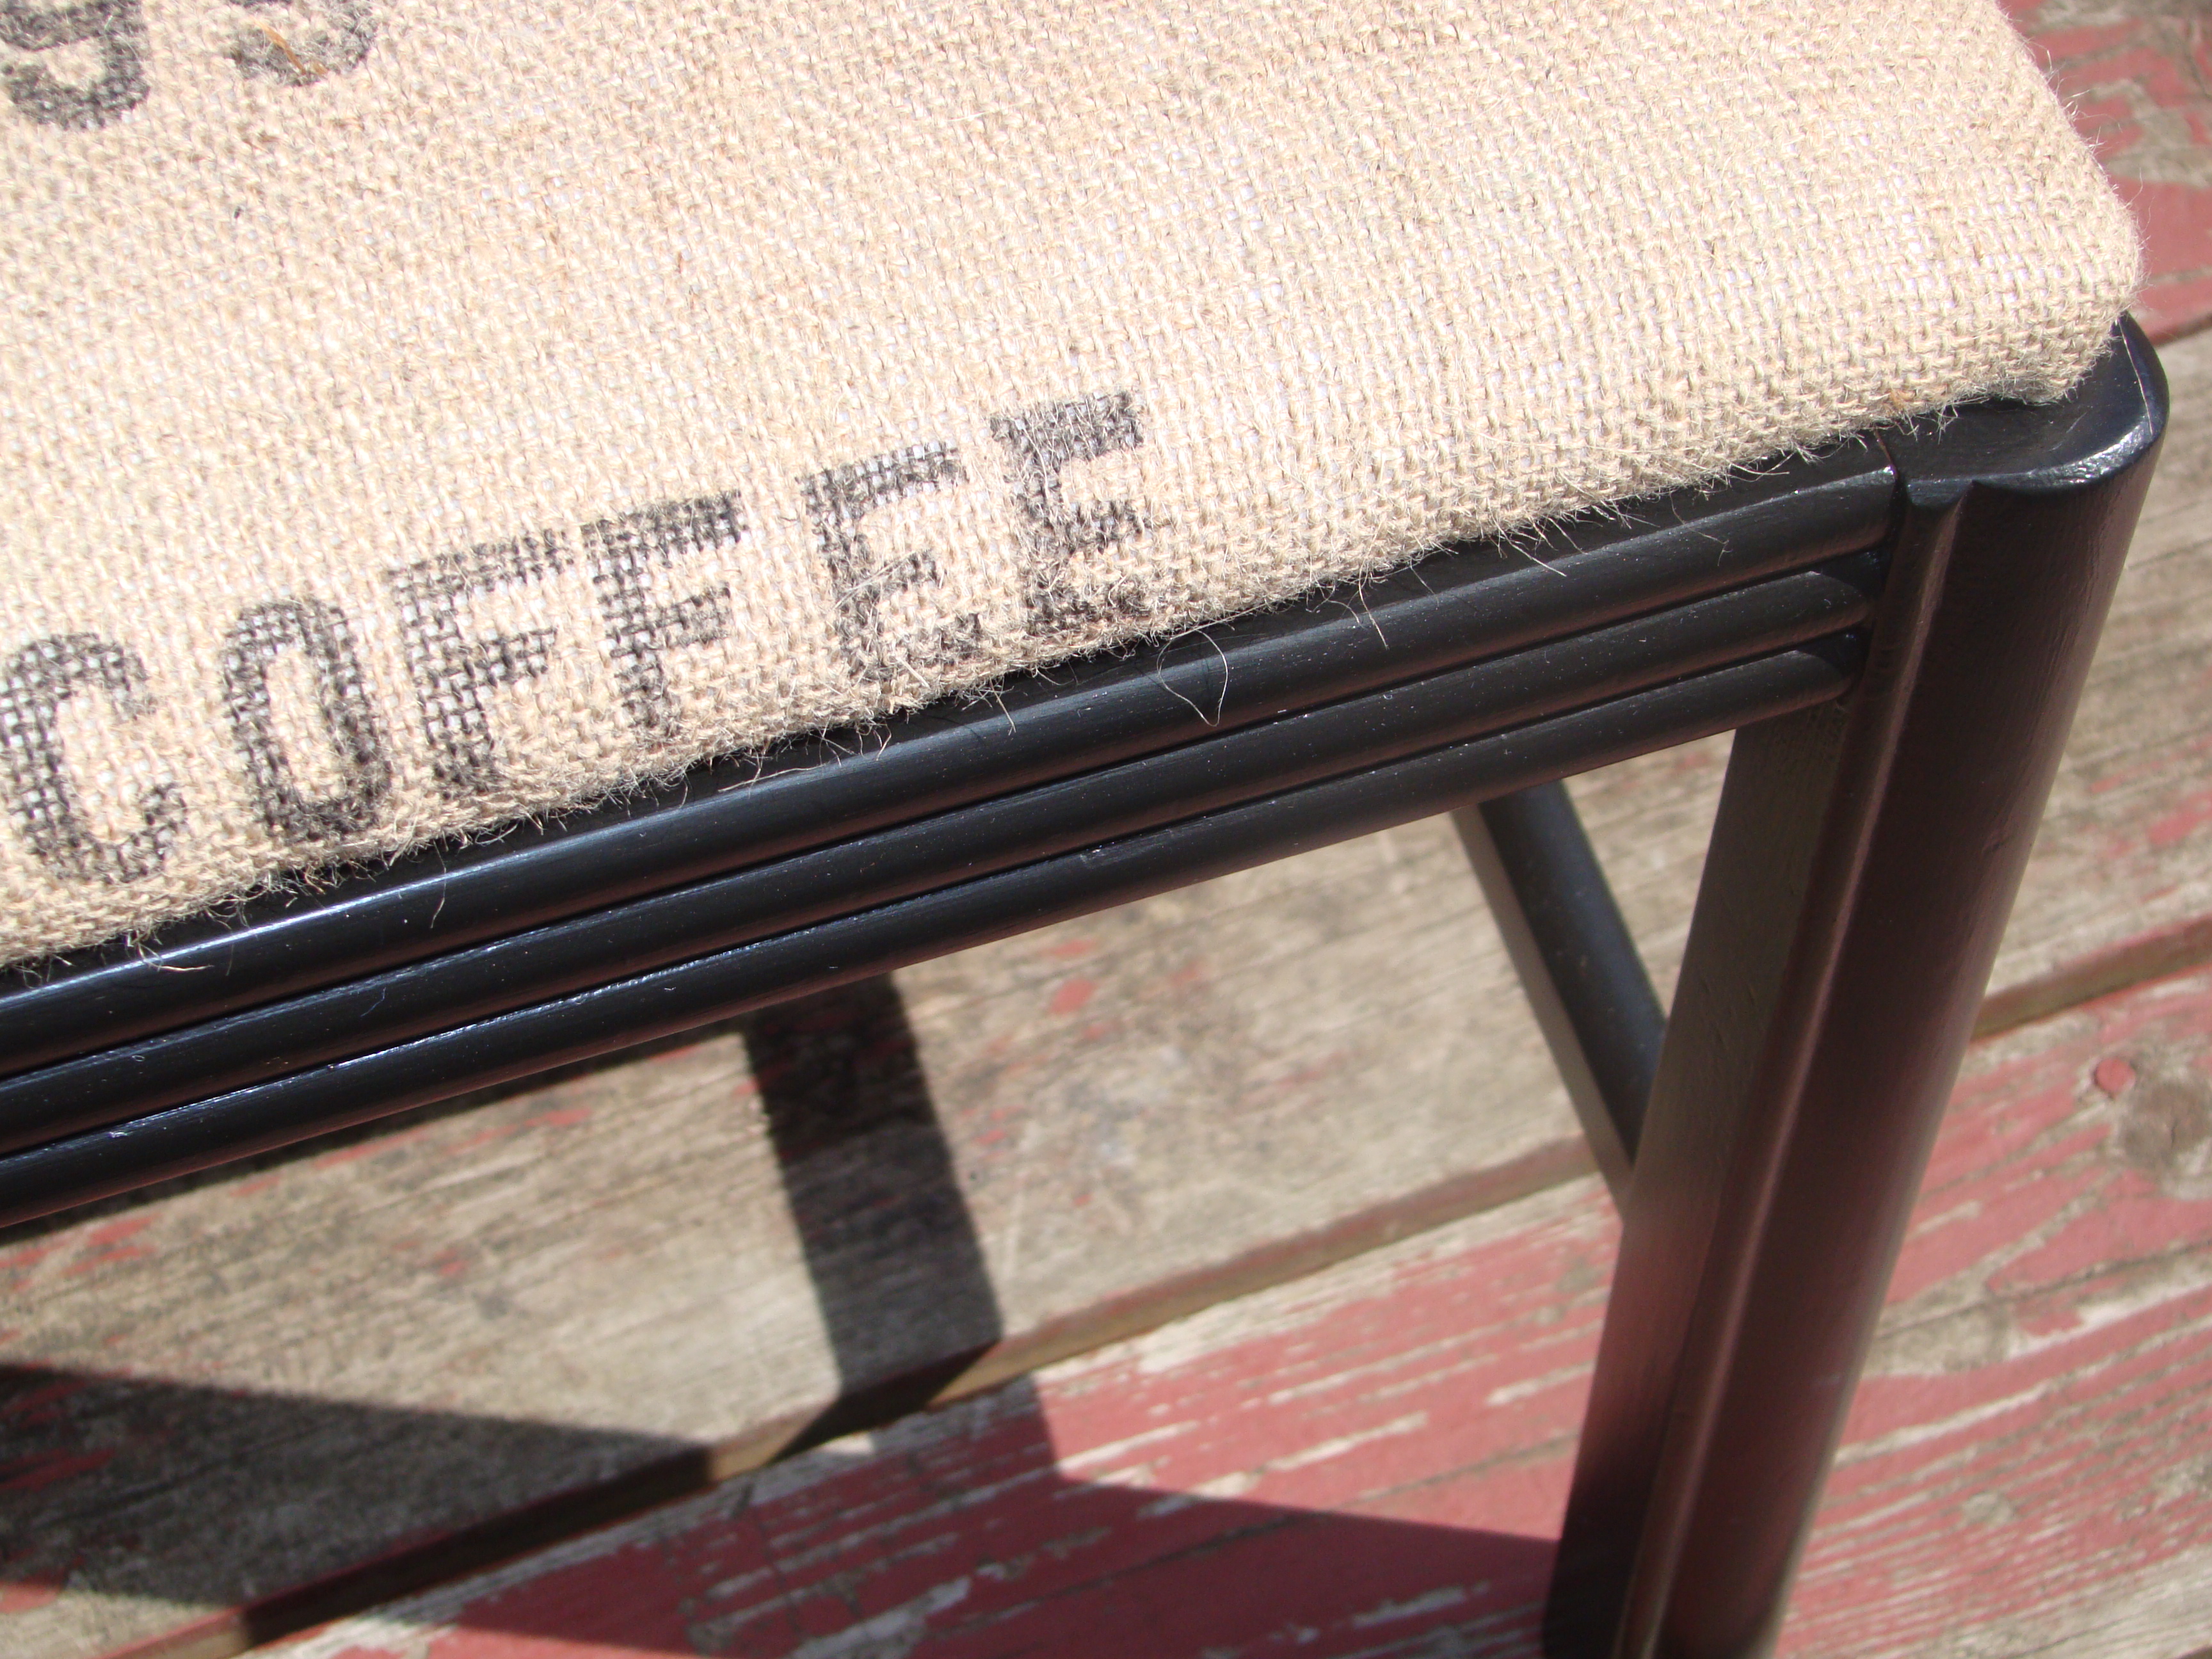
For the bench base, I lightly sanded the wood, then wiped it down with a damp cloth to remove dust. Then, I primed the wood and painted it with three coats of glossy black paint. I replaced the seat, screwing it in from the bottom of the piece, and voila! Definitely an improvement, don’t you think? And it cost nearly nothing to make, since I had the materials on-hand. It would look great at the piano, but it would also make a lovely addition to a bedroom or an empty corner in the living room. I love the contrast in textures…what do you think?
